How to create board games and talking stones activities in Genially

The pandemic has made us teachers realise that there’s so much potential in tech in teaching. Even those schools and principals who shied away from introducing tech in the classroom now can see the benefits it can bring to teaching and learning. It shouldn’t be tech for tech’s sake though. Technology, as everything else in teaching, must have an aim and place. Games and game-like features are always welcome in the classroom but some features of games are not easy to replicate. An added benefit is that students who missed a class or want to have more practice can easily catch up with the tech version of the game. This post is about how we can create board games and talking stones activities using Genially.

Genially has a function called ‘draggable’. It means that any element you add to your creation can be turned into a movable item when in presentation mode. You can turn it on by clicking on the element you want to be draggable then click on the draggable icon (a hand in the top toolbar). Every time you open your creation, all the draggable elements will be reset and appear in their original position.

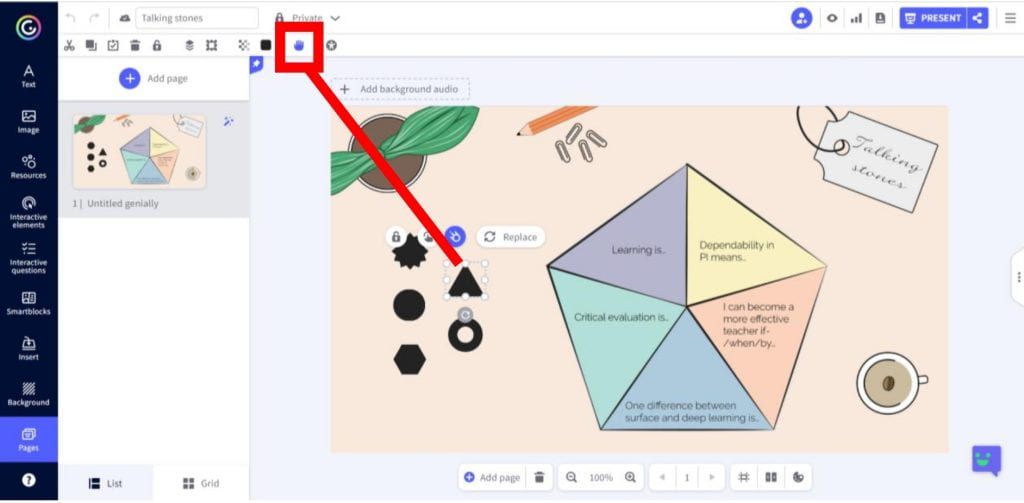
This allows for creating jigsaw puzzles, rearrangeable stories, and of course board games and talking stones activities. Here’s a talking stones example:

Do you have any other idea how the draggable function in Genially could be used? Share with us in the comments section.

Presentations 2.0

Presentations are a very common task in education, either as a summary/review or as assessment (or both). However, student presentations tend to fall short of teacher expectations for the very simple reason that the students don’t do enough research and they tend to end up copy-pasting usually too much text onto slides and reading out whatever they first bumped into after a quick Google search. The introduction of ChatGPT might elevate the experience a bit, but not necessarily much. The end result is a boring presentation where the students didn’t learn much and the audience feel their time has been wasted.

Students need to be taught how to run a meaningful and interesting presentation. They also need to be given the success criteria in advance so that they know what successful completion of the task looks like. This blog post doesn’t deal with the key features of an effective presentation, neither does it explain how success criteria need to be written, especially because ChatGPT is quite good at writing rubrics. This blog posts presents four alternative ideas to the traditional and mainly boring read-out-the-slides kind of student presentation.

  1. Shark Tank. Organise a Shark Tank like experience for the students. Invite teachers to judge the students’ presentation in a true cross-curricular manner. Try to incorporate as much of the show’s spectacular elements as possible. The students need to be equipped with some business knowledge so that they know how to convince the sharks. As such, use this format if you want to bring together several elements of the curriculum, such as business, subject knowledge (the pitch can be related to any subject from social studies to chemistry), and English/mother tongue (presentation skills). It also tests how well students think on their feet as they need to answer the sharks’ questions in a convincible manner.
  2. TED talk. Organise a TED talk event if you want the students to dig deeper into a topic and/or present an interesting, well built-up and though-provoking presentation. It is not as fast-paced as the Shark Tank format, so it’s better suited to introverted students. The students need to be familiar with the structure of a well-built up presentation, they need to know how to grab and keep the audience’s attention, which takes some preparation. If the students manage to get prepared with something truly interesting, this can be a rewarding experience for all participants. If you want to go above and beyond, apply for the TEDx licence to organise the real deal.
  3. CEO introducing a new idea. Think of Steve Jobs or more recently Mark Zuckerberg. Use this format if you want the students to think outside of the box or innovate in one way or another. These CEOs usually present new products or innovative ideas they think will change how consumers think of the experience of communication (iPhone) or interacting with others (metaverse). Not all these presentations have been successful, but they usually attract a lot of viewers because people are hungry for innovative new ideas. So use this format in case you encourage your students to experiment and push boundaries. Students need to be taught how to build up such presentations and how to engage with their audience to sell them a new idea.
  4. Elevator pitch. An elevator pitch is a very short presentation that can be presented to someone during an elevator ride, so it needs to be super focused and it needs to raise interest within moments. Use this format if you have a lot of students, a very short amount of time, or if you want to assess if the students have understood the main ideas of a concept.

Do you like any of the above ideas? Do you have a similar idea? Have tried out any of them? Let us know how it went and if the students liked it in the comments section below.

Tips to make more out of your readings

Quite a few people I know struggle to get into the habit of reading, let alone enjoy reading. In this post, I’m going to share some tips and ideas of how you can take more out of reading both in terms of comprehension and enjoyment of the process.

  1. Take notes. Whenever you read something, it’s worth making an effort to record the most important points. Some people like to underline or highlight ideas, but it tends to be a very ineffective practice. Instead, rephrase the ideas or copy quotes if they are so very well phrased, but don’t simply leave them on the page. Have a place where you collect these ideas or decide how you want to revisit them. If you have enough notes/quotes, you can try the constant comparative method to tease out even more ideas (tip 4 below).
  2. Organise your notes into subtopics. You can understand a topic much better if you have several ideas about it, or even if you have several perspectives on the same concept. Once you start to organise your notes into groups of ideas, you will realise that you have a wider and/or deeper understanding of it, with possible nuances, challenges and so on.
  3. Lateral reading. Read more on the same idea or concept to find out if it is the majority or minority opinion. Read more on the same idea or concept to deepen your understanding, to find out novel perspectives, controversial points, weaknesses, contradictions and so on. It’s super important to have layers and nuances about what you read because nothing is one-dimensional or easy. Lateral reading involves reading up on concepts that are related to the main idea or how certain ideas or methods are conceptualised in a related discipline. This way you can find some novel ways of doing an old thing or a new perspective and thus new understanding you never thought of.
  4. Constant comparative method. This method used in qualitative research is about reading and rereading your notes or quotes in order to organise them into topics. Reread your notes several times and you will notice that the ideas start “talking to you” and new ideas you didn’t see before will emerge. I suggest you put each idea or quote on a separate sheet of paper if you want to do this manually, then organising them into topics is easier. Give a heading to a subtopic if you find one and don’t hesitate to rename them, merge subtopics or create new ones on the way. Of course, this can be done electronically as well, where it’s a lot easier to manipulate the quotes, but maybe it’s more difficult to get an overall picture. You can find more on the constant comparative method in Maykut and Morehouse’s Beginning qualitative research (chapter 9).
  5. Book club. A lot of things are more fun when you do it with others, and reading is no exception. Get together your collaborative team or PLN and discuss your readings. You might find that an important idea eluded you or that a colleague understood a nuance about the topic that you interpreted differently. New ideas and perspectives thus deeper understanding are guaranteed!

🔧 Resources. Find my collected readings in this regularly updated Wakelet collection.

Do you have some other tried-and-tested ideas? Share them with us in the comments section.

The “Hide page” function on Genially

Genially has a lot of awesome features and functions, a lesser known among them is the ability to hide pages from view. This means that you can still have the content and even edit it but users will not see it. Why is it good and how can you make the best use of this function? Read on to find out.

1 Edit while no one’s looking. Use it to make edits so that nobody notices. This is great when you want to update content but you have users who might be looking at that very content. So you can create a duplicate of the page you want to edit, hide it and go about making all the changes. At the same time, the original page is live and viewable. Once you’ve done with the edits, you can reveal it, and hide or delete the original page. Read the Genially blog post to learn more (tip 2).

2 Hide irrelevant info. Create duplicates and hide one page while it’s not relevant. For example, you teach something that requires a step-by-step approach, which means that some information is not relevant or too complicated at earlier stages. You can add the content that will become relevant at a later stage, and hide it only to release it when the students get there in their studies. This way you don’t have to create separate resources and you can keep everything in the same place.

3 Differentiation. You can differentiate content and resources by hiding certain information. In case you have students who have reached higher levels of mastery or their interests will lead them to new paths, you can simply reveal the extra information by turning on visibility on those pages again. Next year or for a new group of students, you can hide the page again.

What other uses can you find for the “Hide page” function on Genially? Share it with us in the comments section.

The “reveal” interactivity on Genially

It’s no secret that I’m a Genially fan, and whenever a new function is introduced, I’m awed and want to find a way to put it into practice. The “reveal” function was introduced recently and here are my thoughts on that.

First, about the function: It’s a kind of interactivity that will show some hidden content upon pressing a button, like the one below. More on this and how to set it up can be found here.

Now how can we make use of this?

As a teacher:

1 Guide students through a learning path. As a whole chain can be put together using the reveal function, teachers can set up a fun path to help learners in their choices. Questions can guide student choice and the teacher can still monitor if students make wise choices. If it’s done for a lesson, no more than two or three levels of options need to be planned, and if more complex tasks are revealed, one “choice path” can last a whole week or unit/chapter.

2 Set up a story using various prompts. The teacher can use picture prompts or short phrases (or a combination of the two to make the creation more inclusive) to create a path along which the students go. As the students make the reveals, they can tell the story. As they will opt for different pictures/phrases along the way, each student can have a personalised story. As a bonus, they can record their voice (Mote) or themselves (Microsoft Flip) to tell the story.

3 Use it in your explanation. You can put together a more interesting presentation with built-in reveal options. As you explain a concept, you can ask students questions and they can opt for answers to engage them in the explanation. The chain of reveals will guide the students through discovery to understanding. As a bonus, you can share the Genially with them for revision or as a study guide.

As a student:

1 Create and narrate their own story. The students can add pictures from the asset library or upload their own. As they go through the pictures, they can tell their story.

2 Illustrate a concept or a process. Students can use pictures from the library or their own drawings to put together an illustration of a concept or process. They can talk about their own illustrations or they can exchange their illustration and talk about someone else’s in the class to demonstrate understanding of another concept.

3 Brainstorming and planning. While planning for any kind of learning or evidence of their learning (STEM, essay, etc.), students can put together a plan they can present to their classmates and ask for feedback. The reveal function will show various options or routes their plan can take.

Any of the above can be used for assessment, especially if the students document their learning or narrate their story. Do you have more ideas? Have you tried any of these ideas? Share with us in the comments below.

What are GIFs perfect to illustrate?

Most people like gifs. They are fun to watch as well as to create. And they can be used in teaching in various ways. They are perfect to illustrate processes, cycles and patterns because of their looping nature.

1 Processes. Processes and production lines are repetitive in nature, which means a gif can illustrate how they work perfectly well. Some examples: the production of paper – from wood to paper, how pencils/balloons/toys are made, the specialisation of merchants, the work of the robots in a warehouse and so on.

2 Cycles. Life cycles of animals, plants, or even objects lend themselves to be looped. The passing of time, weeks, years, can also be showcased in a gif. Some examples: life cycle of the butterfly, a day in the life of a year 5 student, recycling plastic, the water cycle, workdays v weekends, and so on.

3 Patterns. Patterns are also repetitive, and the repetition can take various forms, which can be the focus of study in itself. Apart from the life cycles mentioned above, shapes and forms in nature, fractals and so on create beautiful recurring patterns, which can be shown in a gif. Some examples: ocean shores, the golden ratio in plants and animals such as the sunflower or the nautilus, windows/doors or other architectural forms, lottery winners in the US, stock market crashes, prime numbers and so on.

How to create them? Students can create gifs in several ways. They can draw, they can use stop-motion, or use assets available in any creation tool, such as Adobe Express, Canva or similar. These easy designer tools all have the option to download the creation as a gif. If other tools are used, such as slides or drawings, they can be uploaded to ezgif to create a gif.

Extra. You can collect all the gifs in a Wakelet collection, on a Padlet, or your LMS. As a follow-up or add-on, the students can use their voice to narrate or explain their creation. For this, they can use Mote or Microsoft Flip (in mic mode if they wish).

Do you have another great idea to add? Share with us in the comments section below.

How to create animated video frames from your doodles

Have you ever thought of breathing life into your doodles? And using them as a video frame? Here’s a step-by-step guide on how to create something similar to the one in the video below.

1 Doodle something. Anybody can draw so go ahead and draw something. Think of the video you’re going to create so that your moving frame is in harmony with the content (unlike in the video above 😊). Also think about how much space it will take up from the frame and how you want to position the moving element(s). Don’t forget that you will place this gif as a top layer on your video, so it needs to be transparent. There are several ways to remove the background, for example Canva offers this option.

2 Animate your doodle. This is the tricky part. The one in the video above is a stop motion gif, which means I created several frames (36 to be precise) and put them together in ezgif. Here’s a more detailed guide on how to do this. There are several other easy (and less time-consuming) options to animate your doodles, using various platforms. Read about them here.

3 Record yourself. The next step is creating the video of yourself. Use your phone, your laptop camera, Flip, Screencastify or your go-to video recording tool.

4 Put it together. Now you have everything you need: a gif of your doodle and the video recording of yourself. You just need to put these together. Again, choose your go-to tool, there are so many to choose from. An easy choice for teachers is Canva. Once you uploaded everything, you can add other assets – if you’re using Canva, you can choose from their archive. When everything is done, just download your creation and spread the word.

If you create a video with your own animated doodles, send me a message or tag me on social media – I’d love to see it.

Make progress visible

It’s super important for students to see they are making progress for various reasons. One is that without actually seeing one is making progress or going somewhere worthwhile, it’s difficult to keep up motivation. To look at it from another perspective, once we see that we can actually do something, it can fuel our motivation, triggering the proficiency-motivation cycle. (The jury is still out there on whether proficiency or motivation comes first, to put it very simply.)

Here are some ideas about how to make progress visible for the students.

1 Use the RAG evaluation. Use this Wakelet template at the beginning of a unit or chapter. Add all the concepts, facts, definitions, etc. to be mastered by the end of it in the red column. Students can copy the collection and move the concepts from the red column to the amber column and finally to the green column as they learn and understand more. If you’re using Wakelet classrooms, the students don’t have to submit their work, the teacher can check their progress within classrooms.

2 Use reflective tools. There are plenty of reflective tools that allow for making progress visible. My ultimate favourite is the “I used to think… Now I think…” tool, but there are a lot more. Browse the Project Zero toolbox or watch a short video below with reflective tools. Which ones do you think are the best to capture progress?

3 Use a portfolio. There are several types of portfolios; the ones that showcase the process are best for making progress visible for students. As the students are building up their portfolio, stop them from time to time and have them think about the process and milestones. They should be able to see that they can do things more easily or that they are capable of more complex outcomes and more sophisticated thinking.

Do you have other great ideas? Share with us in the comments section below or on twitter @Gabriella_BW.

Three tips to create beautiful Wakelet collections

Curating items into Wakelet collections is just one thing. That collection needs to look neat and tidy so that it can appeal to your audience. Read on for three tips to make your Wakelet collections super pretty.

1 Cover image. Make sure you find a cover image that reflects the content of the collection and at the same time is of the right size. If your cover image is not of the right size, it will have a grey stripe on the side when looking at it from a portfolio. Also, if you want to create a uniform look, you can consider using Canva or another designer tool so that the style of all the cover images is the same.

2 Items in the collection. When you put items in a collection, by default it is saved with an image (or no image), a title, and a short description. More often than not, this information is not what we want to see there or simply not informative enough. Take some time to change the pic and modify the title and description to create a nicer and more uniform look.

3 Use a style guide or create your own to create a uniform look. As Wakelet has a default font type and design, we can play around with the cover images, layout and text hierarchy when creating a style for our collections. Decide on what font size you want to use to introduce ideas/sections in your collection, the layout that best fits the content, and create stylish cover images.

For more ideas, examples and tips on how to make your Wakelet collections look awesome, check out this collection. Do you have other ideas? Share with us in the comments section.

Endangered species

Sensitize students to the ailments of the world around us with calling their attention to endangered species. Study the red list that contains, sadly, thousands of animals, plants and fungi that are vulnerable, endangered, and critically endangered. Have students research the list for the species from their own country and encourage them to take action. Here are three ideas of what students can do.

1 Create a species profile.

2 Create a video, a poster or an infographic to inform their audience.

3 Interview each other with the interviewee taking the role of the endangered species.

Do you have any other ideas you’d like to share? Please use the comments section to do so!

Skip to toolbar